
ULTIMATE GUIDE TO: DEADLIFT
Hello and welcome to Deadlifting 101 with your host, Siggy!
If you’re reading this, chances are you’re ready to get off the elliptical and take your fitness to the next level. Maybe you’re tired of doing endless amounts of fitness challenges and YouTube workouts that guarantee to “lengthen” and “tone” muscles?
We cannot physically lengthen muscles without cutting them off the skeleton and stretching them out. No form of exercise will make you taller, therefore muscles will never be longer. If that was the case we would eventually all be like Mrs. Incredible.
Speaking of super hero’s, switching from the elliptical to a barbell isn’t going to turn anyone into the hulk over night or ever (without the use of steroids). In fact, if you’re looking to get “toned”, lifting weights is necessary!
“Toneing” = Muscle Growth + Fat Loss
Muscle growth requires lifting weights at moderate to high intensities slightly outside of your comfort zone (plus adequate nutrition and sleep).
The deadlift (DL) is one of the most functional exercises around, meaning it applies directly to your daily movements in life. We already deadlift a lot throughout your day, we call this movement pattern the hip hinge. We use the hip hinge to efficiently pick objects up off the floor like moving a couch, loading the laundry, or simply petting a dog. Lifting weights is going to take you from having a bad a**, to being bad a**, and deadlifts are a major key.
The dead lift is a compound movement requiring movement in three joints (hips, knees, and ankles). It is considered a lower body power lift, but it requires strength from the entire body. The DL uses many muscle groups including the latissimus dorsi (back), trapezius (upper back), erector spinae (middle of back), gluteals (butt), hamstrings (legs), quadriceps (legs) , and psoas (hip flexors). Plus it will engage your abdominal muscles, forearms, and grip strength. The major focus in a DL is on the backside of the body, AKA the posterior chain (back, butt, and back of the legs).
HOW TO DEADLIFT:
Compound lifts not only make us feel bad a**, they light up larger muscle groups and recruit more muscles then an isolation exercise, like a bicep curl. That means, we can burn added calories, release more of a hormonal response, let go of extra stress, hit all muscles in less time, use all muscles as a cohesive unit, and make ourselves strong in movements that mimic real life.
STEP 1:
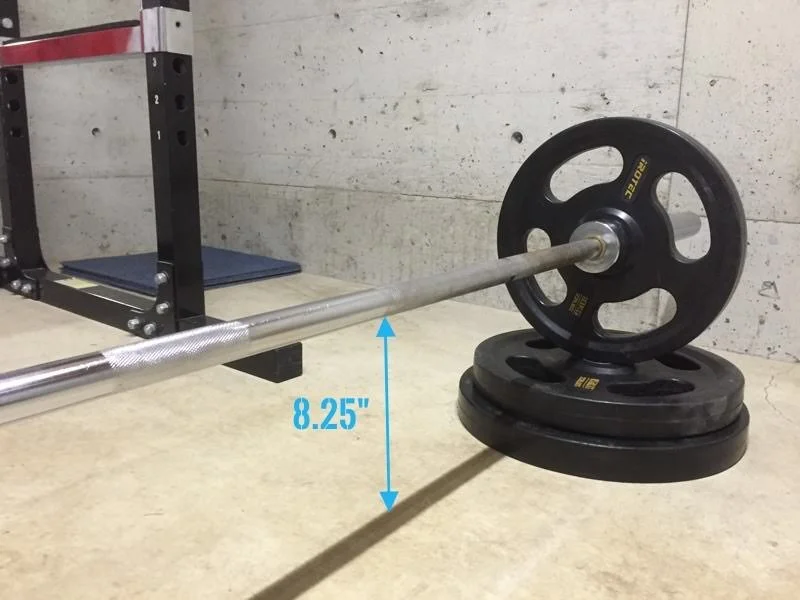
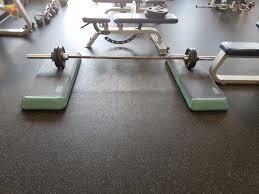
You will probably need to start with smaller plates on each side of your bar and that’s okay! Eventually you will work your way up to larger bumper plates (bumper plates have a larger radius than regular plates). When using smaller/regular plates its important to ensure that the bar is sitting at mid shin height. If the plates are smaller and the bar sits too low it can cause pain or rounding in your back and won’t place your body in the ideal position for force production. The set up below is elevated, I would create this set up for someone with small plates, rounded back, chronic pain, lack of mobility, or tall people (to name a few). A rack pull is also a great option we use for someone with back pain to progress into a deadlift position. In addition, we’re likely to always start new lifters with a kettlebell deadlift. The same rules apply, we need to elevate the kettlebell to shin height.
A personal trainer can help evaluate your mobility, current strength and limitations to determine the best place to start your hinge movement pattern: kettlebell deadlift, rack pull, glute bridge, elevated deadlift, etc.
For educational purposes, we will move forward discussing the barbell deadlift.
STEP 2
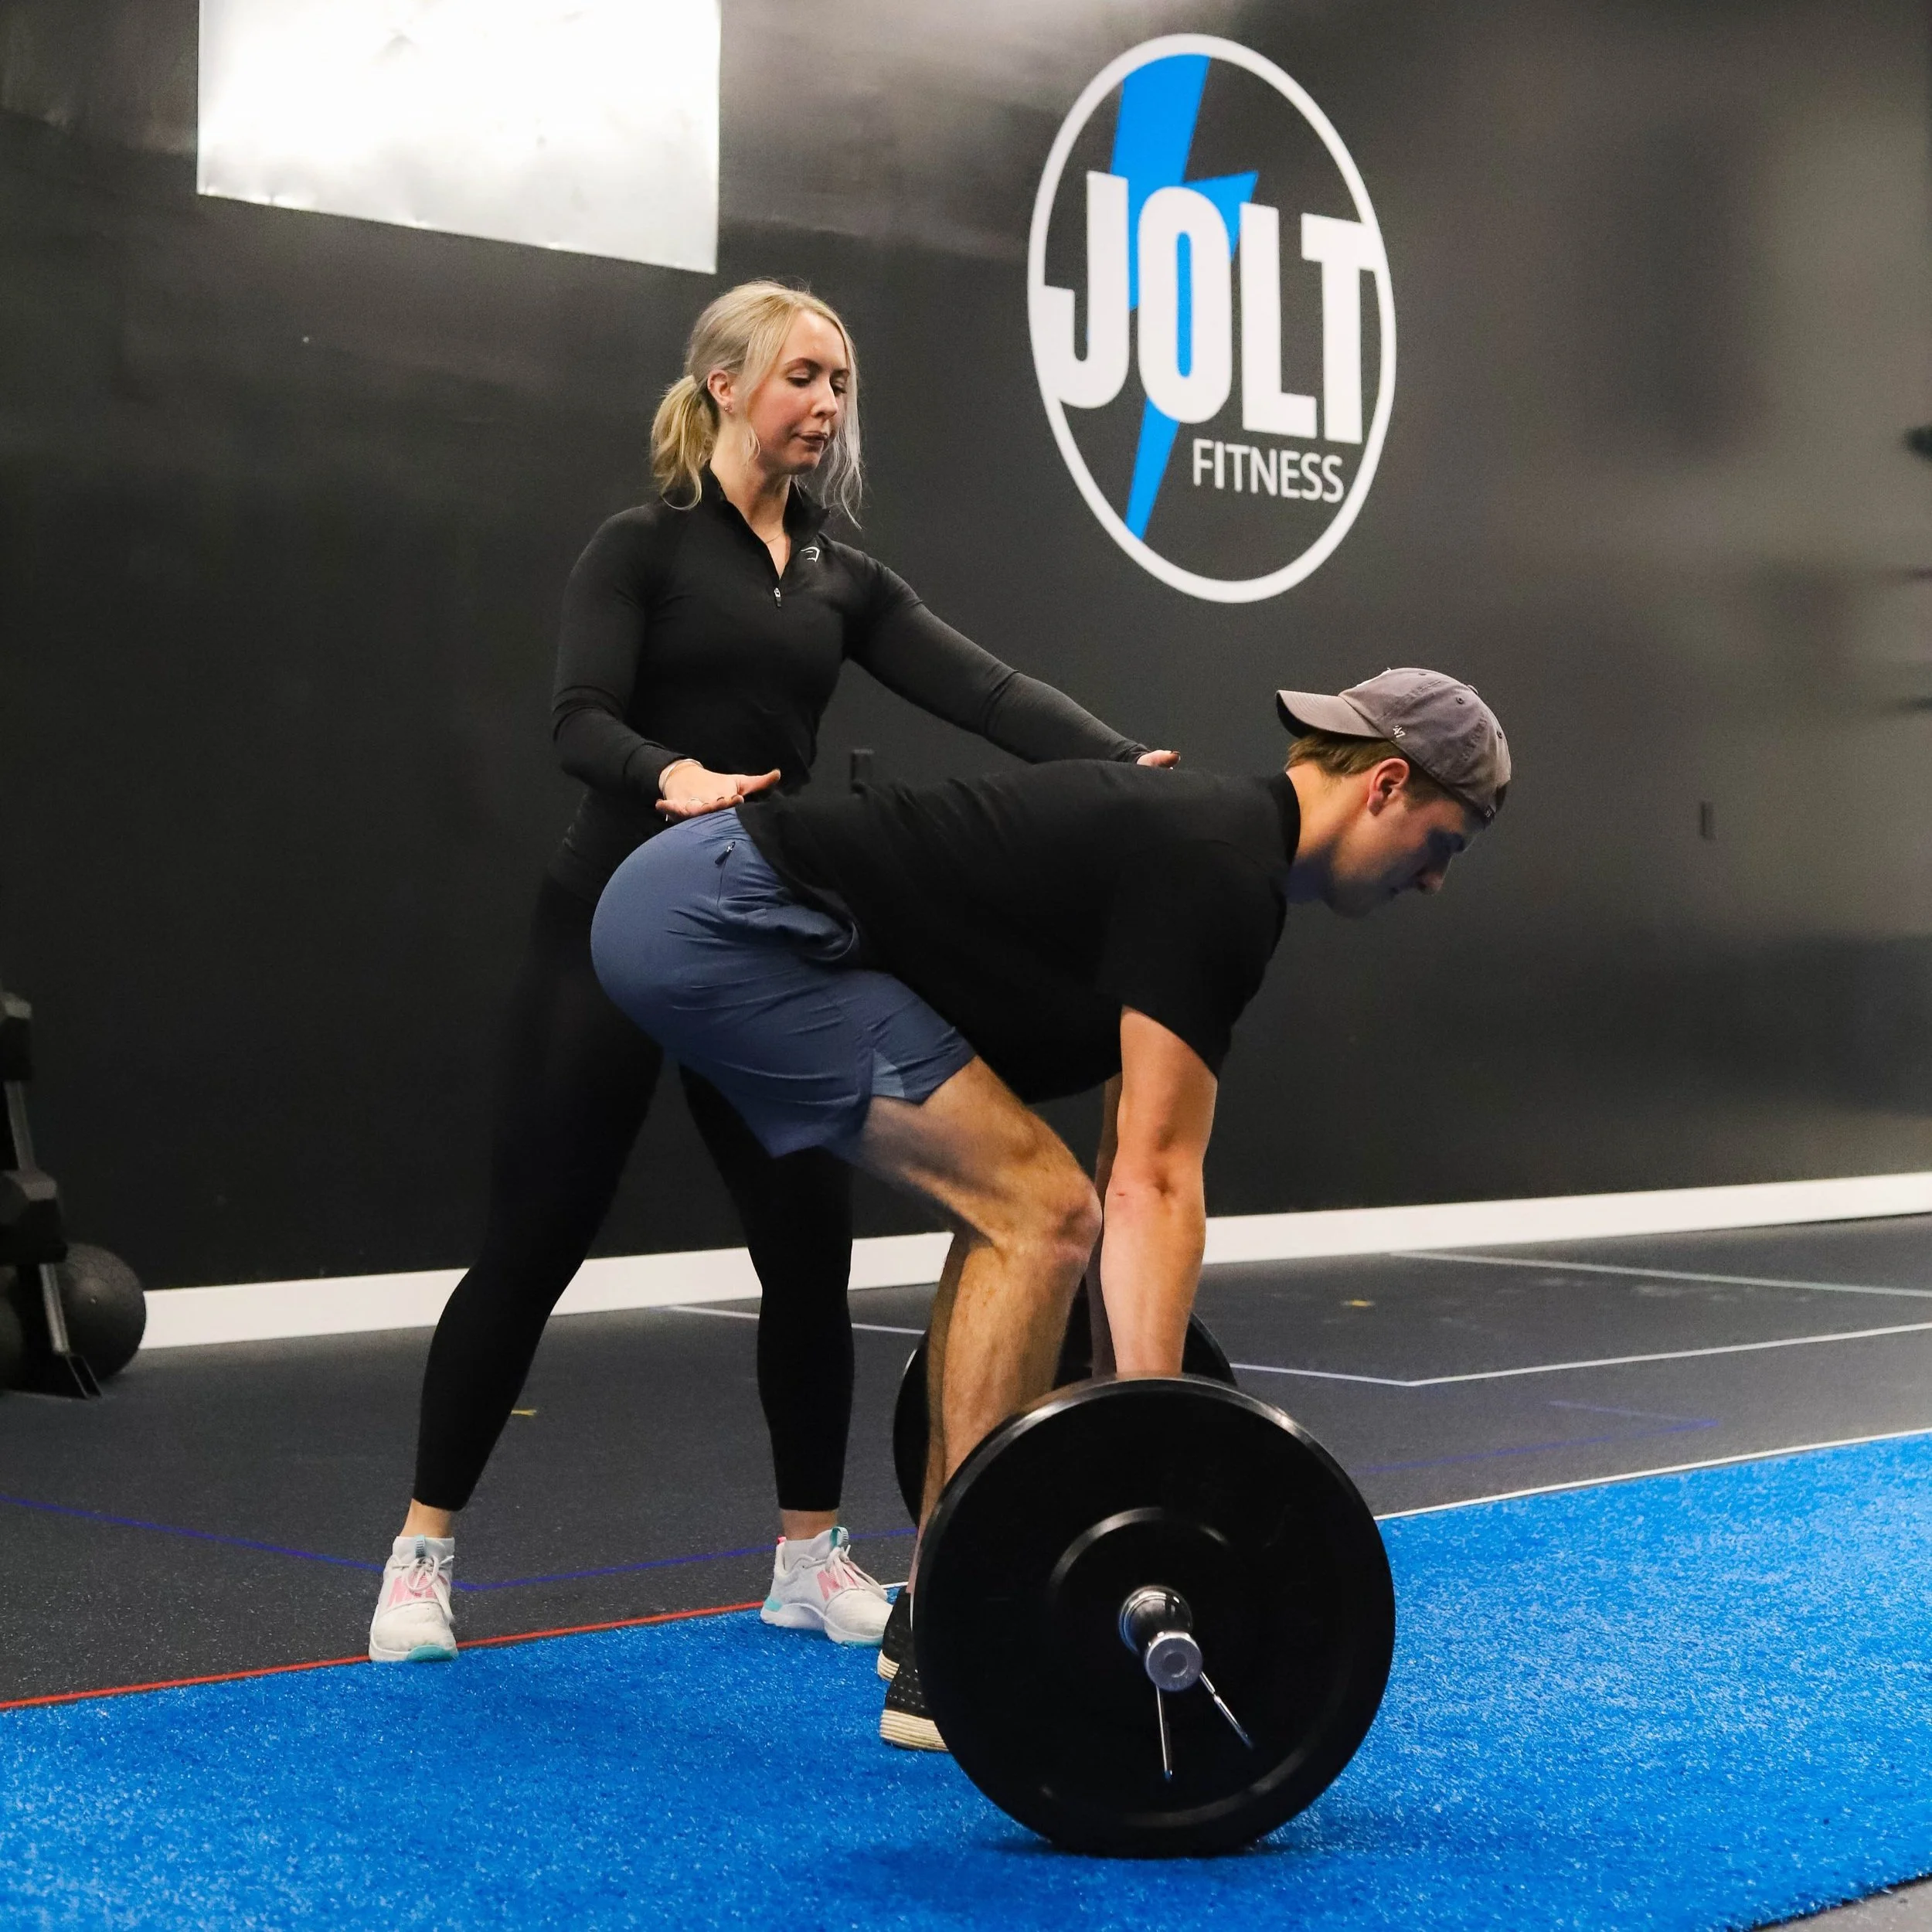
Step your feet under the bar at shoulder width, so that the bar is sitting above your laces. To set up, reach back with your hips like your trying to touch a button on the wall behind you with your butt. Do not round the spine as your hips go back. Once your hips are back as far as they can get, start to bend your knees until your hands reach the bar. Grab onto the bar just outside of hip width (your elbow pits should be be just outside your knees). Lastly, pull the bar into touch your shins.
STEP 3
Take a breath and brace your core while engaging your lats. To do this, think about packing your shoulders by sending them down and back or think about pulling the “slack” out of the bar.
By finding that tension on the bar you should feel built up pressure in your core and hamstrings.
STEP 4
Push the floor out from underneath you and keep your knees separated. Your hips and shoulders should rise at the same time. The bar should travel in a straight path from the starting position to the top. Be aware if you are pulling the bar around the knees - If you are, your timing or set up is off.
STEP 5
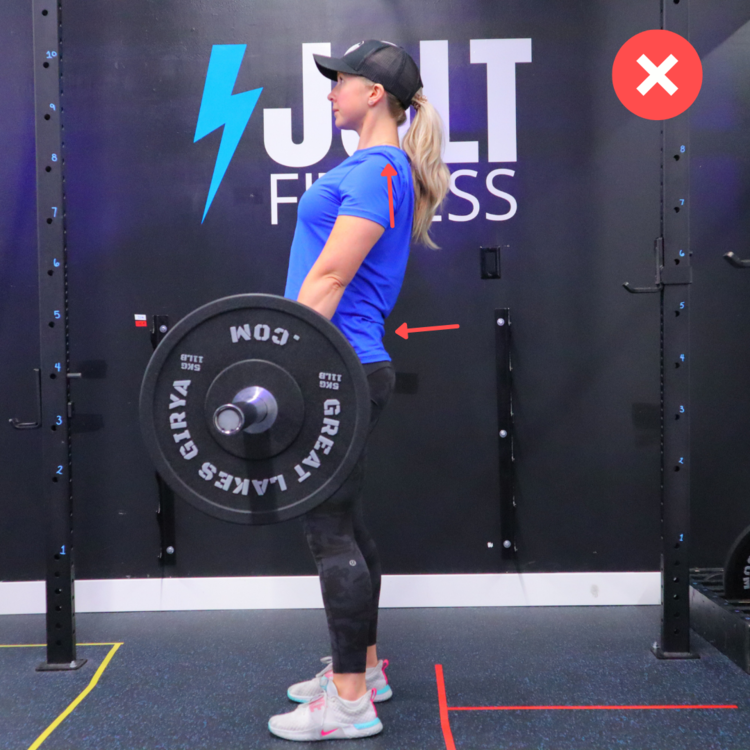
At the top of the lift remain tall, without pushing your hips forward causing that pinching feeling in your lower back and without shrugging the bar.
STEP 6
To set the bar down, reverse the movement. Push the hips back, let the bar pass the knees, and sit back down into the starting position. In my programs, you will see a lot of different types of deadlifts, but everything comes back to the basics.
After some practice your deadlift should feel natural, smooth, and pain free (always).
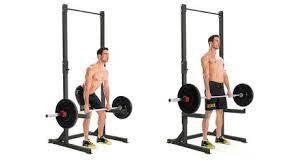
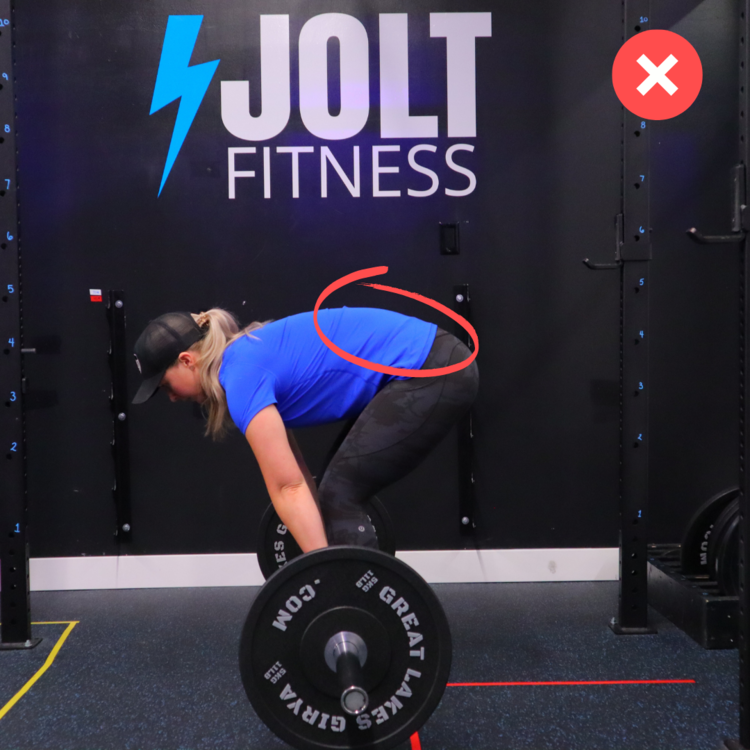
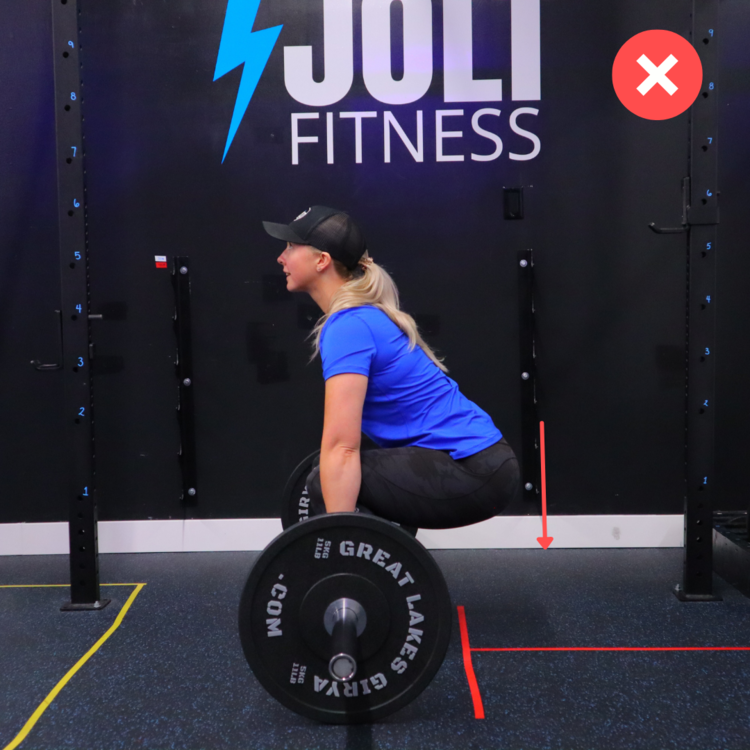
POOR FORM EXAMPLES:
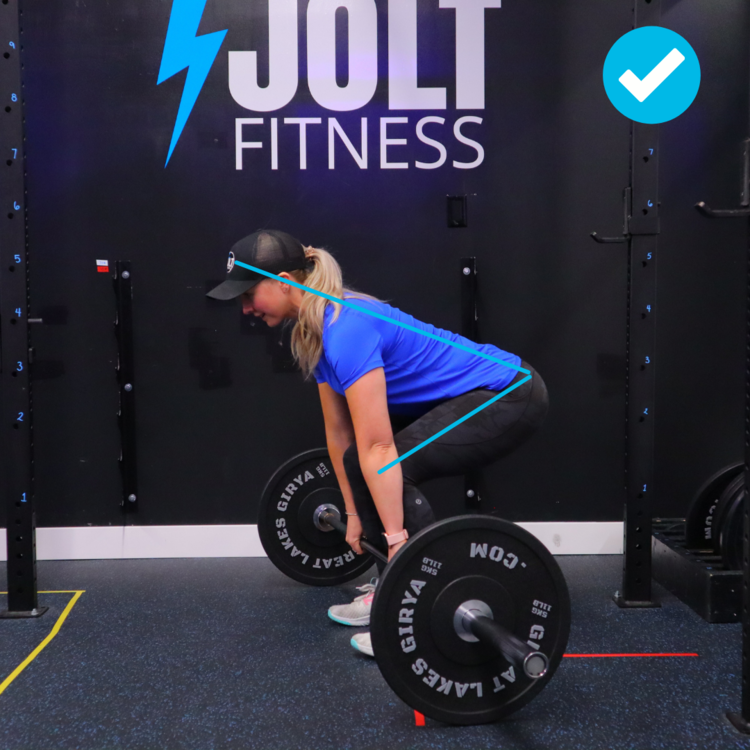
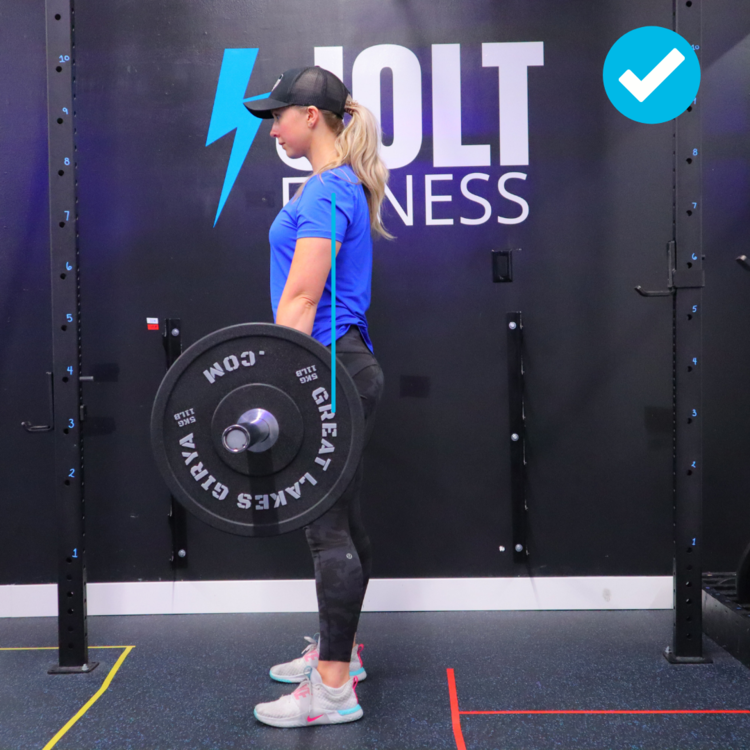
GOOD FORM EXAMPLE:
LEARN TO DEADLIFT @ JOLT
We can teach you how to dougie, I mean deadlift at Jolt in a 1-1 personal training session or Lift class.